

Okta is one of the OAuth2 SSO methods. Click here to learn more about how OAuth2 SSO works and what other OAuth2 SSO methods Bettermode supports.
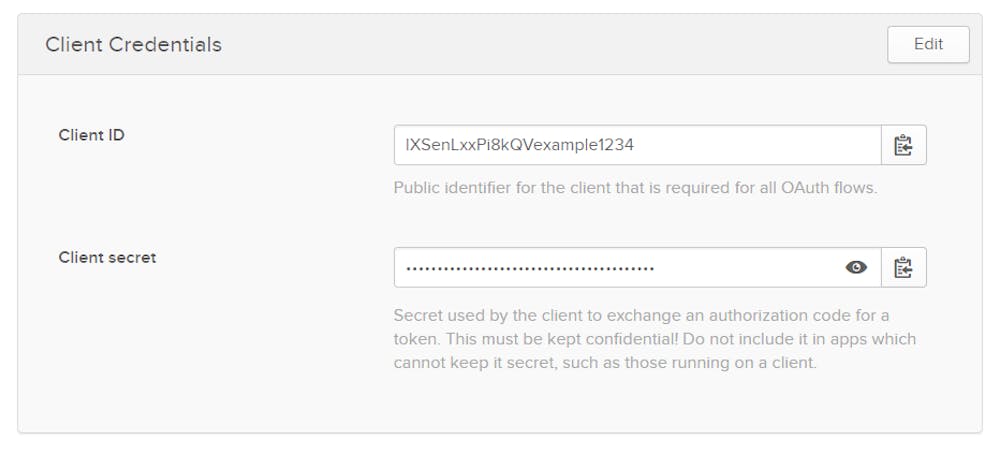
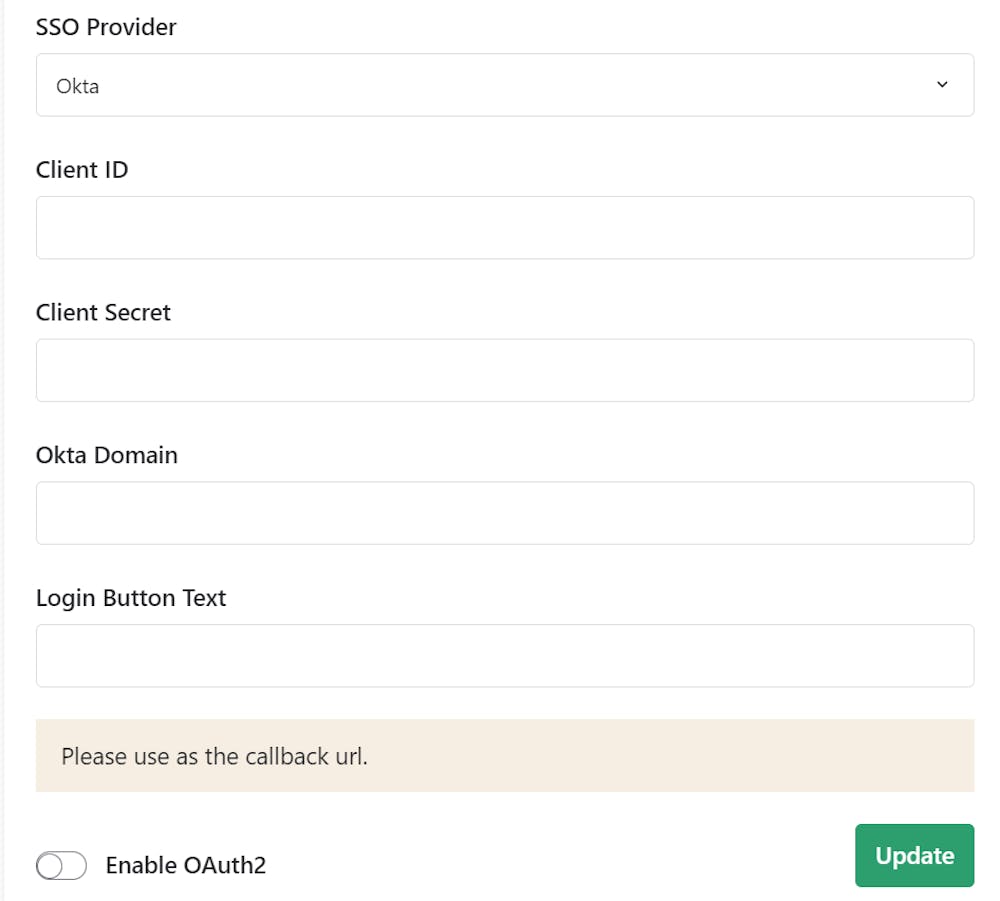
Client ID:* An alphanumeric string publicly exposed and used by the service API to identify the application. This is also used to build authorization URLs that are presented to users.
Client Secret:* A secret known only to the application and the authorization server. It protects the resources by only granting tokens to authorized requestors.
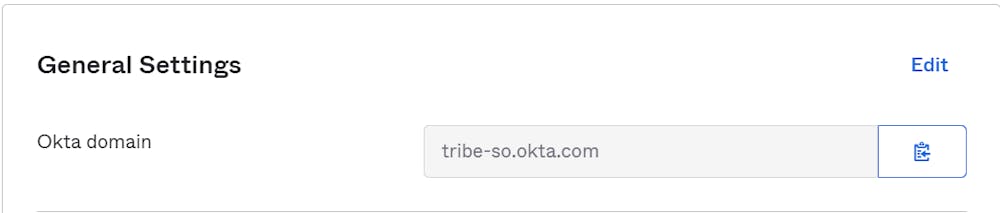
Okta Domain:* Domain URL of your SSO provider.
Login Button Text:* Text defined here will appear on the login page for the users. You can insert any text. For example: Log in with SSO
Callback URL: The URL a browser redirects to once the process of Authentication is complete.
Sign in to your Okta organization with your administrator account.
In the Admin Console, go to Applications > Applications.
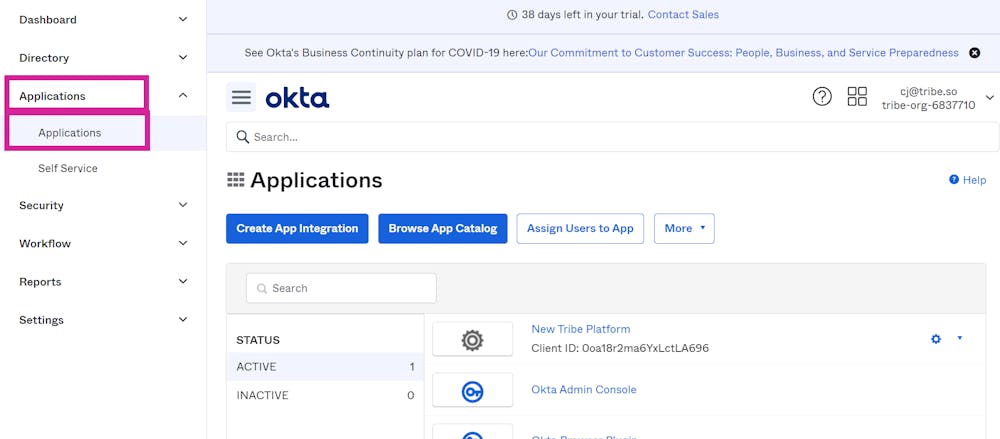
3. If an app is already integrated with an organization, the site admin can search for it here. Click the app integration to open the settings page.
4. If a new Okta app integration needs to be created, click Create App Integration and follow the instructions to create a new app integration. Alternatively, search for a pre-existing app integration in the Okta catalog and add it to an org by clicking Browse App Catalog.
5. On the General tab, the Client Credentials section shows the Client ID and Client Secret values for app integration.
6. Copy the Client ID and Client Secret values using the Copy to Clipboard button beside each text field.
7. After scrolling down, copy the Okta Domain URL values using the Copy to Clipboard button beside the text field.
Here is the step-by-step tutorial to set up OAuth2 SSO using Outseta Credentials:
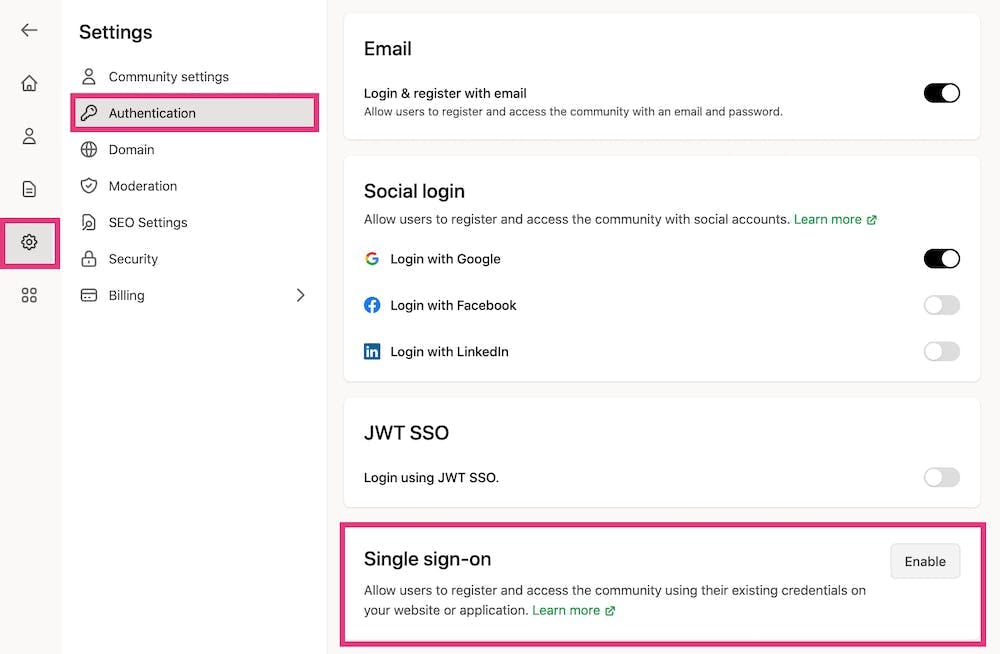
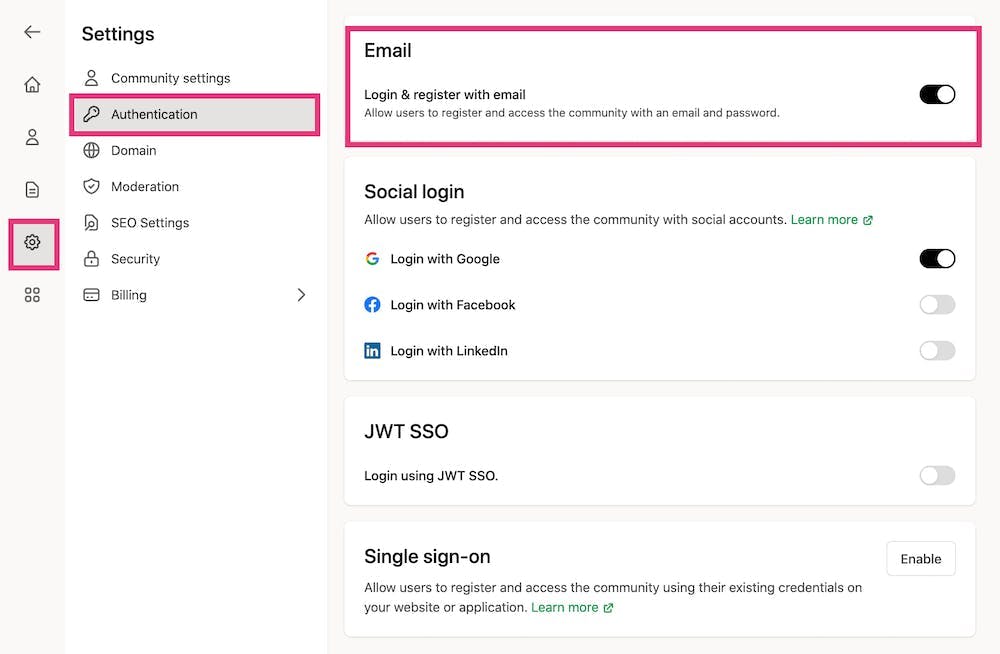
Once all the information from the previous section is gathered, log into your Bettermode site using your admin account, click on your profile picture on top-right > Administration > Settings > Authentication > and click on the Enable Single sign-on option:
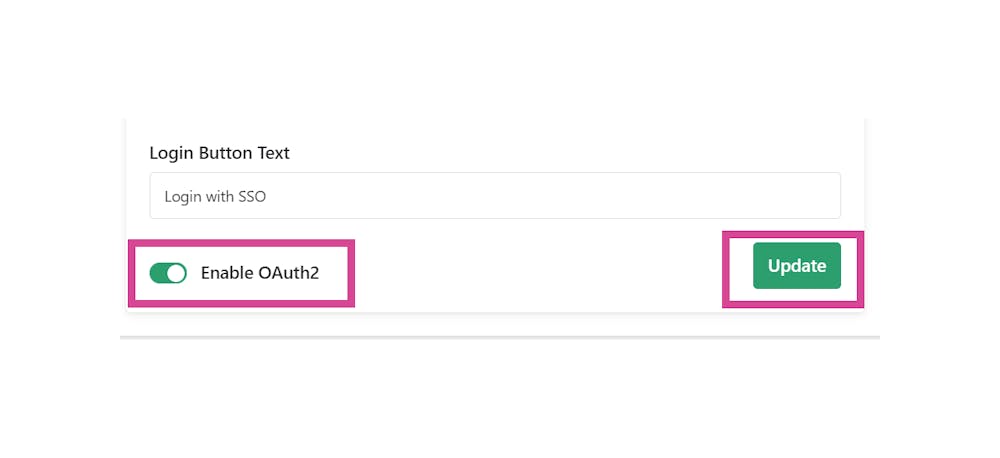
2. Choose Okta as SSO Provider and fill in the required information, as explained in the previous section.
❗note: All fields are mandatory.
3. Once updated, toggle the "Enable OAuth2" switch and click on Update.
4. In the Okta website, add the Callback URL to the Sign-in redirect URI section. It will be the URL of your site address appended with /ssos/redirect.
Callback URL example:
URL - https://community4.blogha.com
Callback URL - https://community4.blogha.com/ssos/redirect

5. To test, visit the community URL and click on the Login Button. Example: https://community1.blogha.com. Authenticate using existing/new credentials on the SSO login page.
6. Congratulations! OAuth2 SSO is now up and running!
If a member should be directed to the SSO provider page directly when they open the site, you need to disable Login & register with email.
To disable this option, click on your profile picture on the top-right > Administration > Settings > Authentication > turn off the toggle for Login & register with email:
Once disabled, the user will not see the default option of signing up or logging in using Email and Password.
