How to set up custom OAuth2 SSO

Enabling Custom SSO

Custom SSO is one of the OAuth2 SSO methods. Learn more about how OAuth2 SSO works and other OAuth2 SSO methods Bettermode supports.
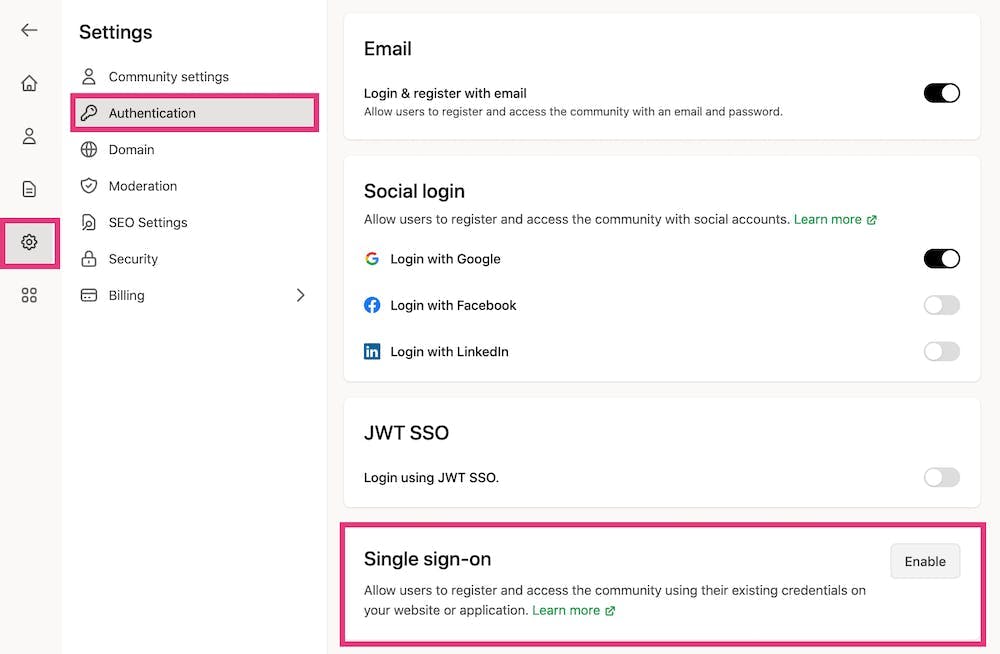
Required credentials for Custom SSO setup

  • Client ID: An alphanumeric string that the service API uses to identify your application. This is also used to build authorization URLs presented to users.
  • Client Secret: A secret known only to your application and the authorization server. It protects resources by granting tokens only to authorized requestors.
  • Identity Provider URL: The domain URL of your SSO provider.
  • Authorization URL: The endpoint where the SSO provider's authorization server retrieves the authorization code needed to authorize user access.
  • Token URL: The endpoint to retrieve the token.
  • User Profile URL: The endpoint where Bettermode sends a GET request to retrieve user information in JSON format. Learn more about the User's JSON Profile Structure.
  • Scope: Defines which user fields Bettermode can access and what permissions it has. Contact your SSO provider if you're unsure what to enter.
  • Login Button Text: The text that appears on your login page. For example: "Log in with SSO" or "Login with ABC".
  • Settings URL: (Optional) The URL where users are redirected when they need to edit their email address to prevent confusion.
  • Logout URL: The URL where users are redirected after logging out of Bettermode. Use this to log users out of your identity management system as well.
  • Callback URL: The URL where users are redirected after authentication is complete. (You will configure this in Step 4.)

Set up Custom SSO

  1. Log into Bettermode with your admin account. Click your profile picture in the top-right corner, then select Administration > Settings > Authentication > Enable Single sign-on.
Administration Settings Authentication menu
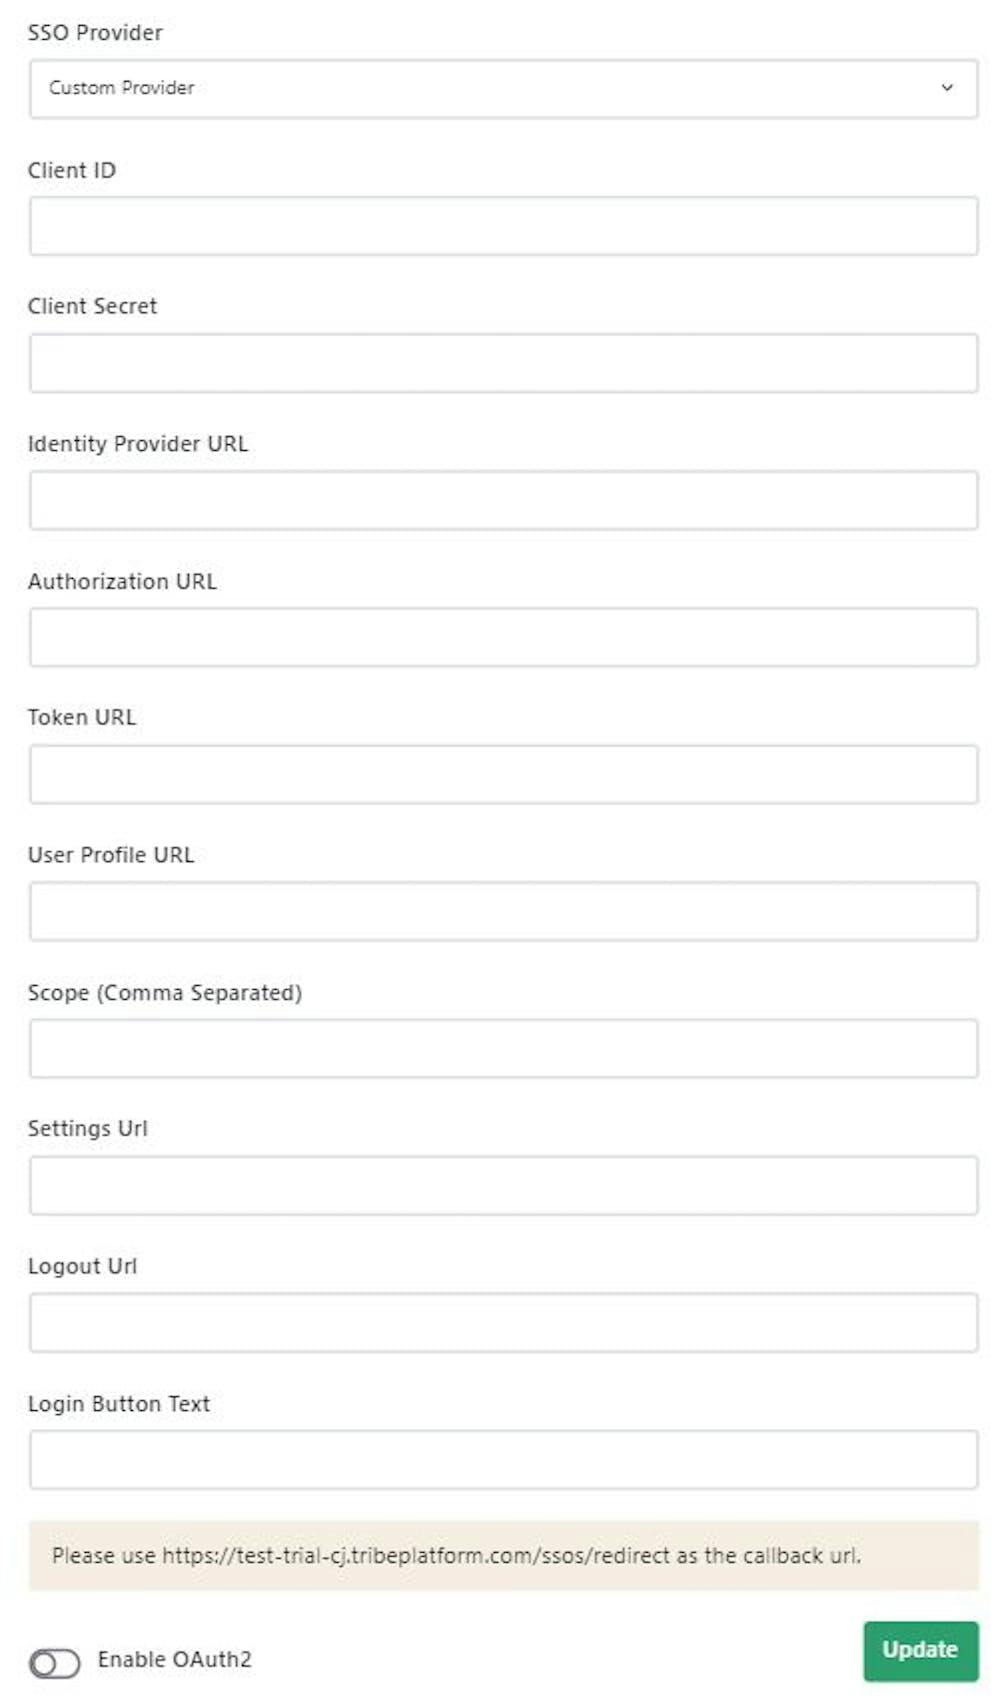
  1. Select Custom Provider as your SSO Provider. Fill in all required credentials from the section above. All fields except Settings URL are mandatory.
Custom Provider SSO configuration form
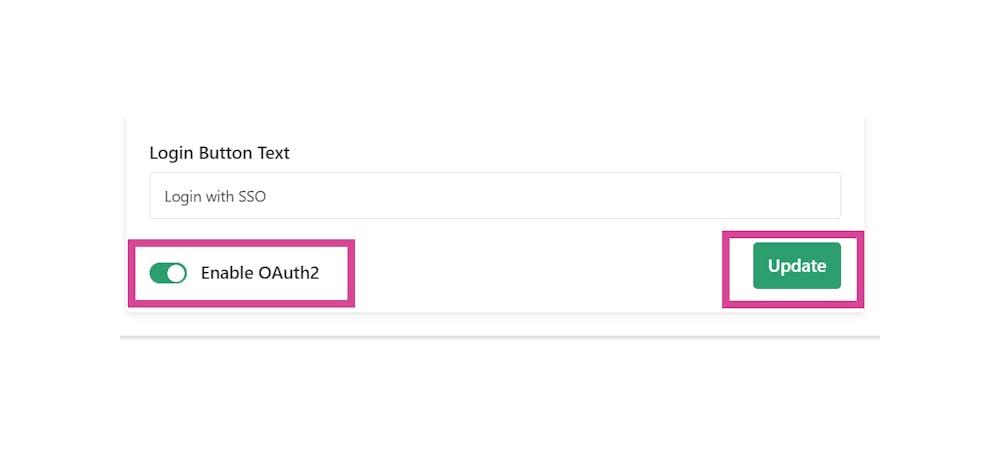
  1. Toggle the Enable OAuth2 switch, then click Update.
Enable OAuth2 toggle switch
  1. Go to your SSO provider and add the Callback URL. This is your site address appended with /ssos/redirect.
    • Example:
      • Your site URL: https://community4.blogha.com
      • Callback URL: https://community4.blogha.com/ssos/redirect
  1. Test your setup by visiting your community URL and clicking the login button. Authenticate using your SSO credentials to verify everything works correctly.
  1. Your Custom SSO is now enabled and ready to use.

Optional: Disable email login

If you want members to use only SSO for authentication, you can disable the standard email login option. This directs users to your SSO provider immediately when they access your site.
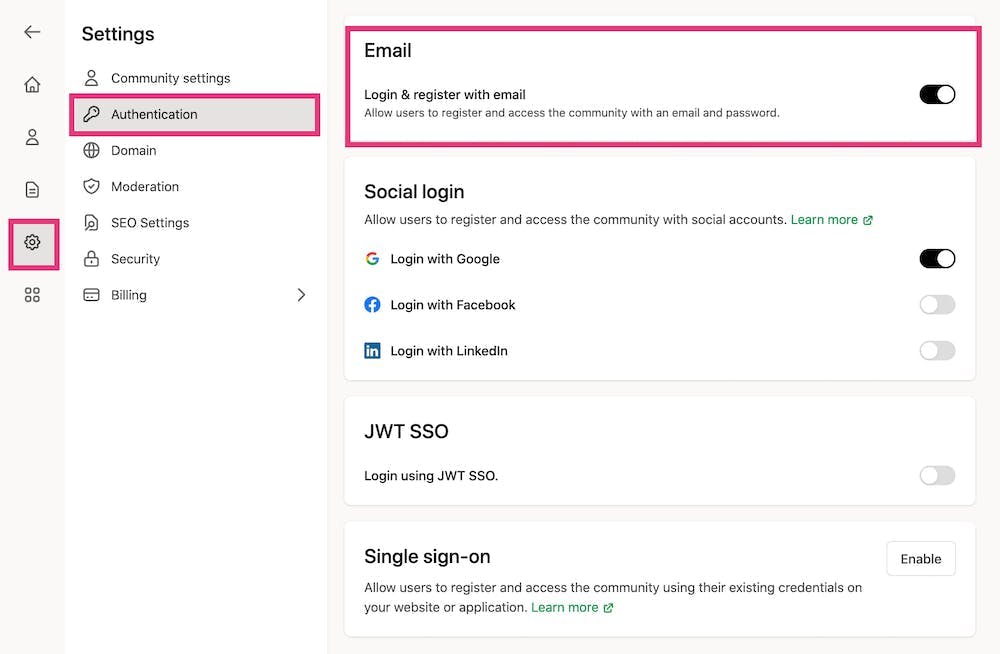
To disable email login:

  1. Click your profile picture in the top-right corner, then select Administration > Settings > Authentication.
  2. Turn off the toggle for Login & register with email.
Login and register with email toggle

Once disabled, users will no longer see the email and password login option.

What's next?

Contact Us

Do you still need help? Learn how to get in touch with the Bettermode Team.